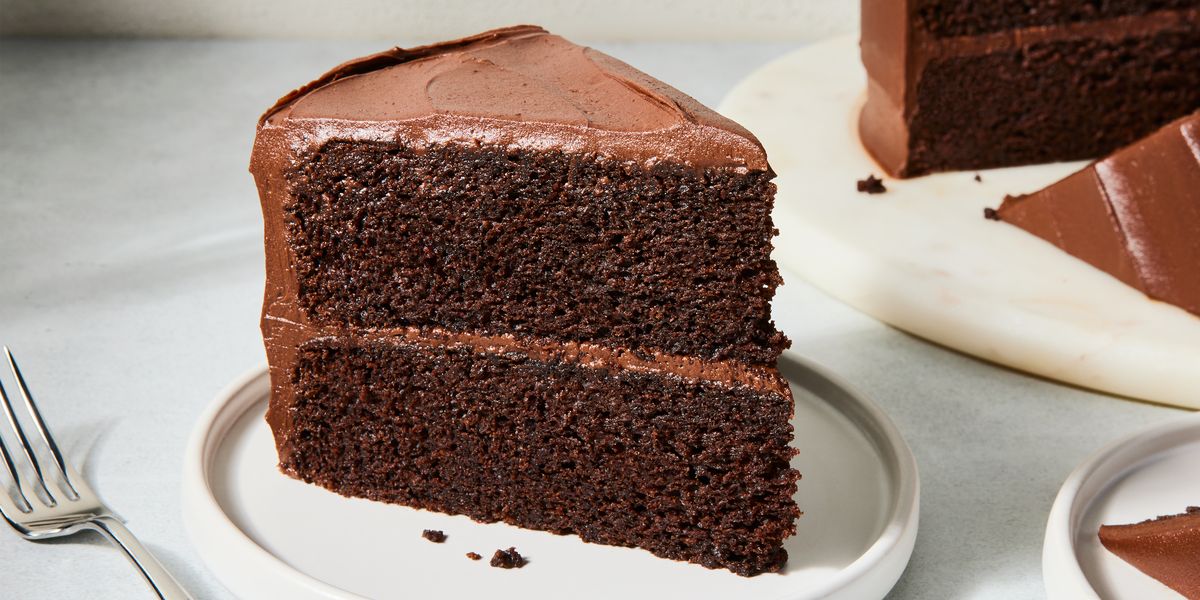
THIS CHOCOLATE CAKE RECIPE IS BRUCE APPROVED—IYKYK
Though it will forever be one of my favorite desserts, if I’m really being honest, most chocolate cakes are pretty lackluster—either they don’t taste enough like chocolate or are so dry they’re unpleasant to eat. I worked for weeks to avoid that here, making sure that this chocolate cake recipe was one that I (and you!) could rely on again and again. My main goal in developing it was to make sure the chocolate was the star, so I tested it over 10 times (and the frosting 5 times!) to guarantee it. Read on for all my tips and tricks to get the most fudgy, rich chocolate cake imaginable, then bookmark this recipe—your birthdays, dinner parties, and holiday celebrations will never be the same.
Yields: 10-12 servings
Prep Time: 15 mins
Total Time: 2 hours
Ingredients
CakeCooking spray
- 1 c.
hot brewed coffee
- 3/4 c.
(60 g.) cocoa powder, preferably Dutch-processed
- 2
large eggs
- 2 c.
(400 g.) granulated sugar
- 3/4 c.
vegetable oil
- 4 tbsp.
unsalted butter, melted
- 1 tsp.
pure vanilla extract
- 2 1/2 c.
(300 g.) all-purpose flour
- 1 tsp.
baking powder
- 1 tsp.
baking soda
- 1 tsp.
kosher salt
- 1 c.
sour cream
- 2/3 c.
(130 g.) semisweet chocolate chips
- 1 1/2 c.
(165 g.) confectioners' sugar
- 1 c.
(2 sticks) unsalted butter, softened
- 1/2 c.
(40 g.) unsweetened cocoa powder
Large pinch of kosher salt
Directions
Cake- Preheat oven to 350° and grease 2 (8") round cake pans with cooking spray. Line with parchment. In a medium bowl, whisk coffee and cocoa powder. Let sit 10 minutes.
- In a large bowl, whisk eggs, granulated sugar, oil, butter, and vanilla until combined. Stir in coffee mixture.
- In a medium bowl, whisk flour, baking powder, baking soda, and salt until combined. Add to coffee mixture and mix until just combined. Add sour cream and stir until just combined. Divide batter between prepared pans.
- Bake cakes until a tester inserted into the center comes out clean, 25 to 30 minutes. Let cool 15 minutes, then invert onto a wire rack and let cool completely.
- In a small heatproof bowl, microwave chips in 30-second increments, stirring between each, until melted. Let cool to room temperature.
- In the large bowl of a stand mixer fitted with the whisk attachment, beat confectioners' sugar, butter, cocoa powder, and salt on medium-high speed until smooth. Add melted chocolate and beat until combined.
- Place one cake layer on a platter. Level top, if needed. Frost top of cake. Top with second layer of cake and frost top and sides as desired.
How To Make Chocolate Cake
Ingredients
- Coffee: You’ve heard it before, but it’s 100% true and worth repeating—coffee makes chocolate taste more like chocolate, particularly if you bloom your cocoa powder in it, like I did here (see below for more info!)
- Cocoa powder: I used Dutch processed cocoa powder here because it’s darker, bolder, and tastes more like chocolate than average cocoa powder. It is admittedly a little bit more expensive—I think it’s absolutely worth it, but if you want to use regular unsweetened cocoa powder here instead, you definitely can.
- Eggs: Here at Delish, our standard is large eggs, and I personally like to go for ones that have the best combination of qualities I look for (like cage-free, antibiotic-free, etc.) while still being in my price range. Buy which ones work best for you.
- Oil AND butter: I use both butter and oil in this recipe because butter is great for flavor, but oil does a much better job of adding moisture to the cake. Moisture is very important in chocolate cakes in particular because cocoa powder tends to dry things out, so we want to add in as much help as we can.
- All-purpose flour: Though you might think to use cake flour in this recipe (it’s in the name, after all, so I get it), I really recommend against it. Honestly, I don’t love cake flour in general—it makes cakes too much like angel food cake, which is not always what I want—but here it really doesn’t result in the sturdy, brownie-like crumb that makes this chocolate cake so decadent. I also almost always have AP flour at home and I bet you do too, so it’s one less thing to go out and purchase.
- Baking powder AND baking soda: Because I do prefer all-purpose flour, which has a higher protein content than cake flour and therefore needs more of a boost to get it to rise, I like to use both baking powder AND soda here. I did test it with just baking powder to be sure, but the batter behaved much better with both.
- Sour cream: I added this to further guarantee a moist cake, plus it adds a pleasant little tang that helps cut through the deep fudgy chocolate flavor.
Step-By-Step Instructions
Start by preheating your oven and getting your cake pans ready. Your leaveners (baking soda and powder) will start working as soon as they hit your wet ingredients, so you don’t want to be lining your cake pans after your batter is made. Here’s how I do it:
Grab a piece of parchment paper, then fold it in half over and over until you form a long pointy triangle. Measure it to the size of your cake pan by putting the point of the triangle at the center of your cake pan. Snip off the excess where it meets the side of the pan, then unfold it—it should be a circle that’s relatively the same size as your pan! A little off is okay, just make sure to hit the entirety of the bottom of the pan with your cooking spray before placing your parchment round inside and you’ll be alright. Set your pans aside, and start making your cake.
This next step is one of the most pivotal in making this cake the most chocolate-y it can be (the second is melting your chocolate, see below): you’re going to bloom your cocoa. Pouring hot coffee over your cocoa powder and letting it sit for at least 10 minutes (known as blooming) activates the cocoa and brings out the chocolatey-ness of it even more. The coffee complements the chocolate and adds more flavor to the cake without making it taste like coffee.
While your cocoa powder sits, you’ll mix together the rest of your wet ingredients (excluding sour cream, which goes in at the end). Once those 10 minutes are up, pour your coffee and cocoa mixture into your wet ingredients, and stir to combine.
In a separate bowl, mix together all of your dry ingredients. Pour your dry ingredients into your wet ingredients, and mix until just combined. Then mix in your sour cream, and your cake batter is ready to go.
Split into your two prepared pans, then pop them into your preheated oven for about 25-30 minutes, or until a cake tester or toothpick comes out clean. Let them cool.
While your cake is baking, you can make your frosting. This chocolate frosting is similar to a standard buttercream, except that it uses both cocoa powder and melted chocolate chips to achieve an extra rich and creamy texture.
The key to success here is to make sure all your ingredients are at the same temperature. Let your melted chocolate chips cool back down to room temperature so it doesn’t melt your frosting, and make sure your butter is also completely at room temperature so that it doesn’t seize the chocolate when you add it in.
You can use a double boiler, but I like to keep things simple and just use my microwave. Melt it in 30 second intervals, stirring in between each one until it’s fully melted. Let cool.
Then beat your powdered sugar, butter, cocoa powder, and a pinch of salt together in a bowl. Pour in your cooled melted chocolate, then beat again until smooth.
Once your cake layers are cooled and your frosting is made, it’s time to assemble your cake! Start by getting your cake layers out of their pans. Tip: Take an offset spatula and run it along the edge of the cake in the cake pan to release it before flipping it out.
Most baked cakes will have a nice little dome on top, so we need to trim them so they stack evenly. I like to trim them while they’re atop a spinning cake stand because it helps keep my knife nice and stable, but if you don’t have one you can still do this—just put your cake on a plate that you can turn on your counter. To trim the tops off, place your knife right on the edge of the cake where the dome starts, barely inserting it in. As you rotate your cake stand, put just enough pressure onto your knife that it cuts further in as it spins. Try to avoid sawing back and forth, as that’s how you get an uneven surface.
Then it’s time for frosting! Another tip: frost your cake on whatever serving dish you plan to use so you don’t have to move it once you are done. In order to keep it clean, put pieces of parchment paper underneath your cake. Once you're done, pull them out and voila, no errant frosting smudges!
Start by placing your first cake layer onto your serving plate, then smooth an even layer of frosting over the top, going all the way to the edges. Don’t worry if it spills over onto the sides—you’re going to frost them eventually anyway! Add your next cake layer and repeat the process, continuing onto the sides until your entire cake is covered in frosting. If you’re having trouble keeping things smooth, or if your kitchen is particularly warm, try doing a crumb coat first. This is where you put a very thin layer of frosting on the outside of the cake, then let it chill in your refrigerator for a few minutes so it hardens just enough that it locks in crumbs. Then pull your cake out and continue frosting.
I kept things simple here, but feel free to have fun with additional decorations like chocolate shavings, sprinkles, fresh fruit, a drizzle of white chocolate, whatever you like.
Full list of ingredients and directions can be found in the recipe and video above.
Storage
The cake layers, unfrosted, can be kept in an airtight container at room temperature for up to 3 days. If you plan to frost the cake, keep them tightly wrapped in the refrigerator for up to 3 days or in the freezer for 1 month. After frosting, store the cake in an airtight container in the refrigerator for up to 1 week.
More Cake Ideas
Not a chocolate fan? We’ve got you too.
- White cake. If you’re a vanilla cake fan and have never tried a white cake, you’re in for a treat. This white cake is tender, light, fluffy, and moist and layered with satiny-smooth vanilla frosting.
- Vanilla cake. Chocolate cake’s quintessential foil, this recipe is the perfect jumping off point for any and all celebrations.
- Strawberry cake. This homemade strawberry cake is sweet and tart in the best way possible, thanks to a strawberry compote incorporated into the batter AND the frosting.
- Red velvet cake. With a rich chocolate flavor, a fluffy texture, and a tangy cream cheese frosting, this Southern dessert was made to impress.
Made This?
Let me know how it went in the comments below!
2023-07-28T15:13:56Z dg43tfdfdgfd